
How to Enable a Catalog and Link a Vendor in Manager
Step 1: Turning the catalog on
- Navigate to Configurations (SE) or Setup (5.9) along the top of the program.
- Next go to Special Maintenance (you have to be on the HOMESCREEN of the program in order for the Special maintenance button to light up).
- Select Toggle Catalog Availability.
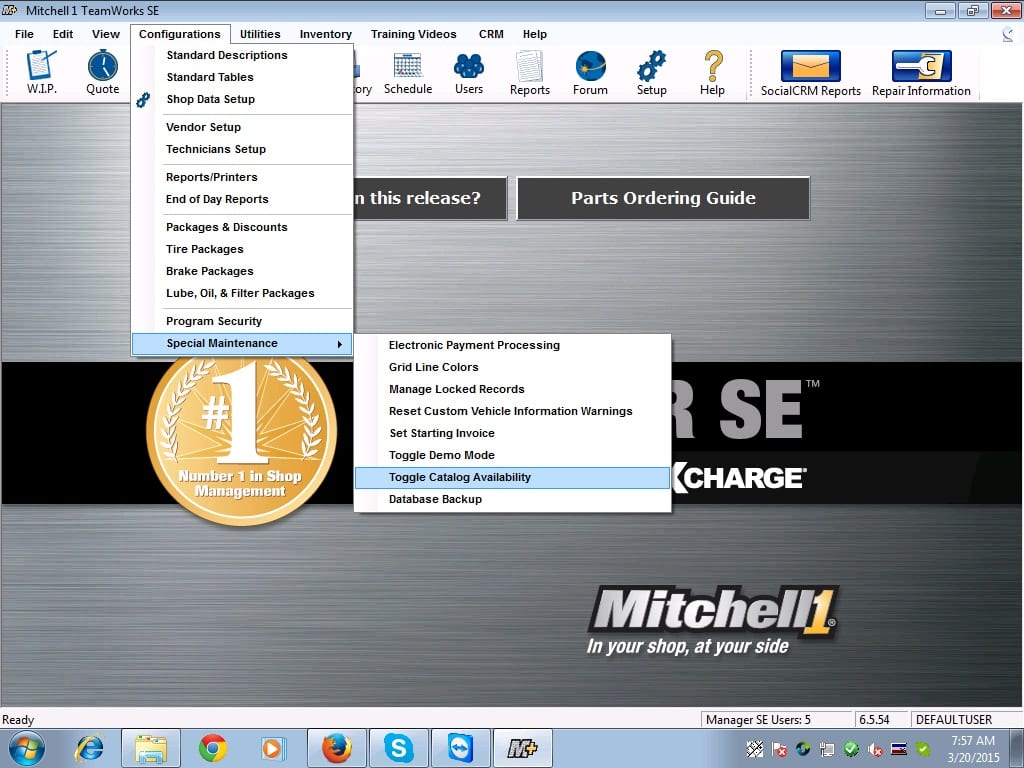

In this example the FirstCall-New catalog has been turned on, but you can choose to toggle any vendor needed.

Step 2: Vendor Setup
- Navigate to Configurations (SE) or Setup (5.9) along the top of the program.
- Select Vendor Setup.

Step 3: Vendor Setup Continued
- Select Add at the bottom of the window.

Step 4 : Vendor Setup Continued
- Input a Code (There is no specific code that needs to be used. It is whatever naming convention you choose).
- Select the Vendor Type.
- Enter the name of the vendor.
- Select the Setup Link at the bottom of the window.

Step 4: Vendor Setup Continued
- Select the Vendor from the Link Type Selection window and click OK when finished.

Step 4: Vendor Setup Continued
- Enter in the username and password for the vendor (this would be supplied by the vendor not Tech Support).
- You should now be able to open an order and use your new vendor button to connect to the catalog.